What do you REALLY need to start serving clients online?
I have talked about this a bunch in a couple of other blogs – like “Do you need a website” and “Easy tools to run an online business: Acuity” so today I’m going to talk about Zoom.
If you aren’t familiar with Zoom now I would be very surprised.
Before the global lockdowns, I was using Zoom daily and running my business online with people having a variety of experience with Zoom.
But now we have all been connecting digitally a bit more, even my in-laws can use Zoom!
I do still want to talk about it in the online business context though. Because I really want you to know how I ran my business in the early days particularly without a website.
And I want to give you my opinions about Zoom 🙂
Zoom is an online video conferencing software service. Basically: this tool lets you meet up with people online. Yes! There are loads of other ways you can do this: Facebook calls, Facetime, Google hangouts and on and on.
I actually use the free plan of Zoom for 1:1 calls and LiveWebinar for group calls because I don’t like monthly payments. I managed to buy LiveWebinar with a single payment for lifetime access. It’s worth checking if that deal is still available with AppSumo if you are interested (it says sold out but just search in their search bar in case there is a different version of the offer – valid till November 26 2021).
So the steps I recommend for setting up your business to serve people online are:
- Get your ABN
- Create a bank account just for your business
- Create a PayPal business account
- Get your Acuity set up
- Get your Zoom set up
- Choose a Social media platform
- Creating content
- Doing some market research
- Starting to share offers
You can go deeper with setting up your Acuity in this blog.
LISTEN ON THE PODCAST
At some point you hopefully find yourself setting up your Acuity emails that are delivered to your client by the robot to confirm the appointment/session. This is a great time to share information about how to connect with you on Zoom for your session.
The ability to pop your Zoom details into the Initial Confirmation email is only available on the paid plans of Acuity. If you only pay for one tool, let it be Acuity at first. It will let you take payments, synchronise your calendar and customise these emails. In my opinion, it’s worth it.

Two things I’ll address here are:
1. What kind of Zoom plan do you need?
and
2. What info goes into that Acuity email confirmation?
Zoom has a perfectly good free plan if you only want to do 1:1 sessions. So you can get away with the free plan for a very long time.
You might like to upgrade your plan if you want to deliver group calls that last more than 40 minutes. This would be helpful for webinars, live course calls and group program calls.
There are loads of other options for what Zoom can do for you but for now, let’s keep it simple. And affordable. If you are just wanting 1:1 sessions, stick with the free plan.
Now that you have your account you can create “Meetings”. My favourite thing to do is create “recurring” meetings so that I can have a URL I use to access the meeting space. I can also give that URL to clients so they can join the meeting with me.
You can do that following the instructions in this video.
Now you have the URL of your recurring meeting, it’s time to pop back into your Acuity and tell the client what they need to do to prepare and how to join you on the call.
On the free plan of Acuity, you will only get the immediate email sent out to confirm the appointment at the time of booking and you can’t customise your emails. If you’re sticking with the free plan, you will need to send an email the hour before your meeting with this info manually.
If you are on the paid version you can customise your initial confirmation and send an email an hour before using the robot.
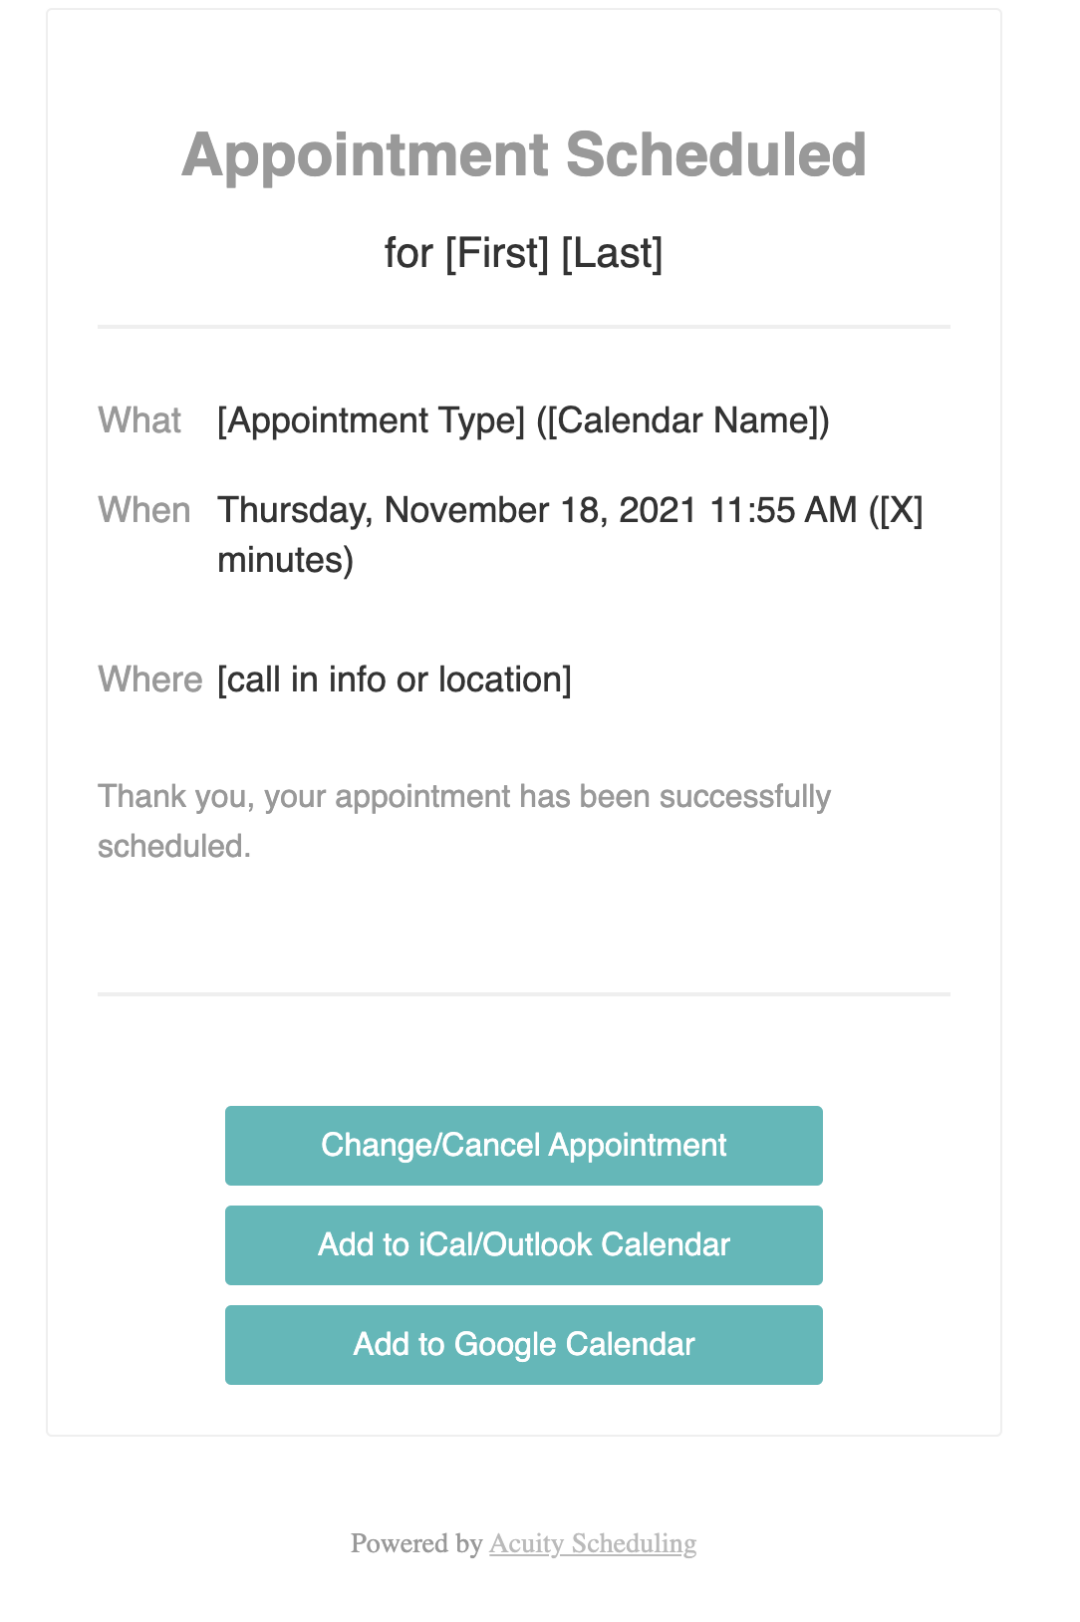
Here’s an example of the default email that gets sent out to clients once they book:

You can find it in Notifications > Client Email > Initial Confirmation
I recommend that you pop in and edit that email. You can include your Zoom link, and any other specific preparations you would like them to have done like sign terms & conditions or do a specific journaling practice. I show you how to do that in this video
The beauty of this is: now you have a URL you can share with people so that they can book, and get automated information for how to see you in the session.
BOOM.
You are ready to share your Acuity booking link on social media now. So the next step is to decide which social media platform you want to play on for now.
Here’s a quick tip on that: where are your people and where are you happy to create content?
Start with one social media platform at a time.
Facebook business page: share your Acuity booking link in the spot called “website”. You can also pop it in the blue call to action button.
Instagram account: share your Acuity booking link as your “Website” in your bio.
Zoom settings
I recommend going into your Zoom settings and seeing what you want to change. The main things you might like to change are:
Turning off that woman that announces the session is being recorded 🙁
Checking whether you want a waiting room or password protected
And just have a poke around and see if there are things you want to change to make it suit you better.
Do you have more questions about Zoom and setting up your online business?
I’d love to hear them – hit me up in the comments
If you found this helpful and you like, you can make a small donation.
“I pay my respects and acknowledge the people of the Yuin Nation, custodians of the land on which I live and work. I also pay respect to all Elders — past, present and future.”
Do you just want to talk to me about your business and website?
I’d love to chat. You can book a free chat and we can discuss website set up and all of the other things I mentioned here. We can even set it all up of ryou and save you the headace.
Go ahead and book a free chat here:


